
REVIEW · ARNHEM TOURS
6 Hour Battle of Arnhem Tour by Car with Private Guide
The bridge is only part of the story. This six-hour private tour connects the Battle of Arnhem’s scattered sites, from the Wolfheze dropping zones to the John Frost Bridge. I like the private car and guide, which keep the day focused and flexible, and I like the use of original battle maps and firsthand accounts shared by guide David. The main drawback is the price: $971 for up to three people is fair for a private experience, but costly for one or two people.
The route covers Oosterbeek and Arnhem without asking you to piece together distant sites on your own. You get transportation, a dedicated guide, and time at important locations, but lunch costs extra and some stops are brief. If you want a careful military history tour rather than a quick photo outing, this is the right kind of half-day.
In This Review
- Key points to know before you book
- Why this Arnhem tour works best by private car
- Wolfheze dropping zones: where the operation began
- Airborne Cemetery in Oosterbeek: a quiet central stop
- Oude Kerk in Oosterbeek: visible signs of fighting
- Arnhem stops: Urquhart’s hideout and St. Elisabeths Hospital
- John Frost Bridge: the tour’s best-known location
- Lunch in Oosterbeek: a useful pause at your cost
- Original maps and firsthand accounts make the difference
- The $971 price: fair for three, harder to justify alone
- Who should book this Battle of Arnhem experience
- Booking details that matter
- Should you book the six-hour Arnhem tour?
- FAQ
- How long does the Battle of Arnhem tour last?
- How many people can join the private tour?
- What time does the tour start?
- Where can the tour begin?
- Is lunch included in the price?
- Is transportation included?
- Can I cancel for a full refund?
Key points to know before you book
- Private tour for up to three people: The $971 rate covers the group, not each person, and private transportation is included.
- Battlefield route with real variety: You visit dropping zones, a cemetery, a damaged church, a wartime hospital site, and John Frost Bridge.
- David’s maps add structure: Original maps showing how the battle progressed help turn separate locations into one connected story.
- Pickup can be arranged: Possible pickup points include a hotel near Arnhem or Oosterbeek, Arnhem Central, Oosterbeek railway station, or Ede railway station.
- Lunch is separate: A 30-minute lunch stop is included in the day, but you pay for the meal yourself.
- Travel time counts: The advertised six hours includes driving between locations, so this is a moving battlefield tour rather than six full hours at monuments.
Why this Arnhem tour works best by private car
The Battle of Arnhem sites are spread across Arnhem, Oosterbeek, and Wolfheze. A private car makes the route practical because you are not trying to connect several sites by public transport while keeping track of a fixed schedule.
The group limit is three people. That gives you a quieter setting than a large coach tour, with room to ask questions and keep the discussion centered on your interests. If one person in your group wants more military detail and another wants a clearer overview, a private guide can adjust the pace more easily than a standard group outing.
The tour begins at 10:00 a.m. and returns to the meeting point. Pickup arrangements are discussed before the booking is final, so you can ask about starting at Arnhem Central Station, Oosterbeek railway station, Ede railway station, or a hotel near Arnhem or Oosterbeek.
The six-hour duration sounds generous, but remember that driving time is part of it. The listed visits total about three hours, including lunch. The remaining time covers transport and roadside stops. That is not a flaw, but it matters when you set expectations. You are getting a broad battlefield route, not long museum-style visits at each place.
More Arnhem and Hoge Veluwe trips:
- Kröller-Müller Museum Entrance Ticket
★ 4.4 · 241 reviews - Otterlo: De Hoge Veluwe National Park Entry Ticket
★ 4.5 · 97 reviews - Arnhem: Burgers’ Zoo Entry Ticket
★ 4.7 · 88 reviews
Wolfheze dropping zones: where the operation began
The first stop is Wolfheze, where you visit the dropping zones connected with the start of the Battle of Arnhem. You have about 20 minutes here, with no admission fee.
This is a useful opening because the tour begins at the point where the operation came into the area, rather than starting at the more famous bridge. Your guide can establish the route and explain how the battle’s opening movements relate to the later fighting in Oosterbeek and Arnhem.
Twenty minutes is enough for an introduction and a look around, but it is not a long field walk. If you want time to study the ground in detail, you may find this stop short. Still, it gives the day a clear starting point and helps you understand why the later sites are spread across several communities.
I especially like this kind of beginning because it gives the story a sense of direction. You are not simply collecting memorials. You are following the battle from its first locations toward its final focus at the bridge.
Airborne Cemetery in Oosterbeek: a quiet central stop
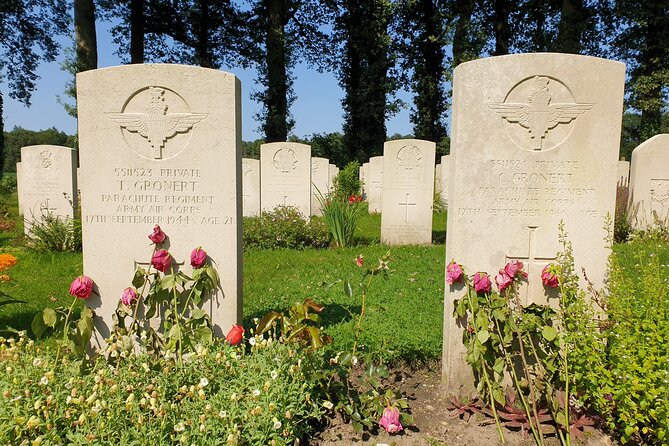
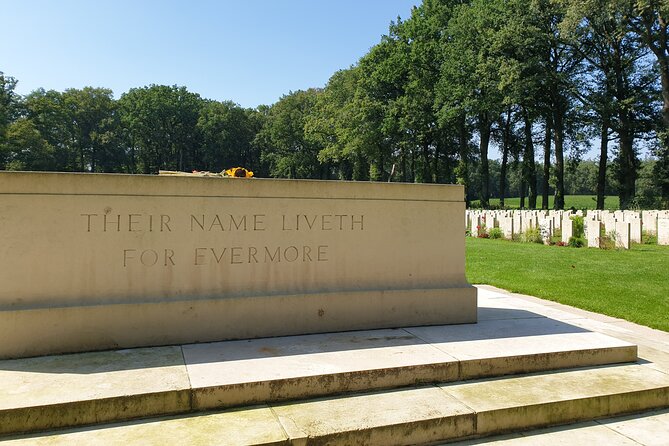
The Airborne Cemetery is the most reflective stop on the route. You have roughly 30 minutes to pay your respects while the guide shares stories about the men buried there. Admission is free.
A cemetery can be easy to rush through if you are visiting alone, especially when you do not know which names or units connect to the wider battle. A guide’s stories give the place more meaning without turning it into a long lecture. The personal accounts are an important part of the tour’s appeal, particularly for anyone who wants to understand the human cost rather than only the movement of troops.
This stop also gives the itinerary a change of pace. The dropping zones introduce the operation. The cemetery asks you to pause and consider its consequences. That balance is one of the better features of the route.
You should allow for a respectful, quiet visit. The tour is not built around entertainment, and this is one point where a brisk schedule would feel out of place. The half-hour timing appears suitable for a guided visit, though anyone wanting to read every inscription may need to do so quickly.
Oude Kerk in Oosterbeek: visible signs of fighting
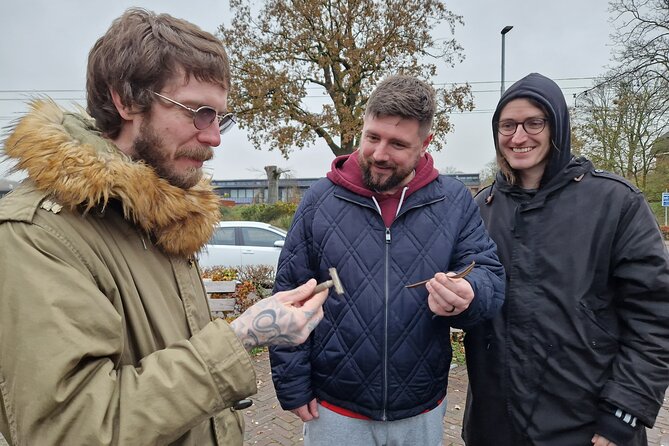
At the Oude Kerk, or Old Church, you spend about 30 minutes walking around the building and seeing bullet holes left by the fighting. Admission is free.
Physical traces such as bullet holes can make a military story easier to grasp. Maps and dates tell you what happened. Damage on the walls shows how close the fighting came to ordinary buildings and places of worship. The guide’s explanation helps connect what you see with the action that took place around the church.
This is another stop where a private guide adds value. Without context, a damaged wall is simply a damaged wall. With the guide, you can ask what role the church played, how the fighting affected Oosterbeek, and how this location fits between the cemetery and the Arnhem sites.
The visit is outdoors and relatively short. The information provided does not promise a long interior tour or a museum collection, so you should think of the Oude Kerk as a battlefield location with visible evidence, not a full museum stop. That distinction helps you choose this tour for its places and interpretation rather than for indoor exhibits.
More private tours:
- Amsterdam: Kröller Müller Museum and Hoge Veluwe NP Private Tour
★ 4.0 · 16 reviews - 2,5 hour Battle of Arnhem Tour with Private Guide
★ 5.0 · 16 reviews - Amsterdam: Private tour to Kröller-Müller Museum
★ 4.8 · 7 reviews - 1,5 hour private guided Mural Street Art tour in Arnhem
★ 5.0 · 5 reviews
Arnhem stops: Urquhart’s hideout and St. Elisabeths Hospital
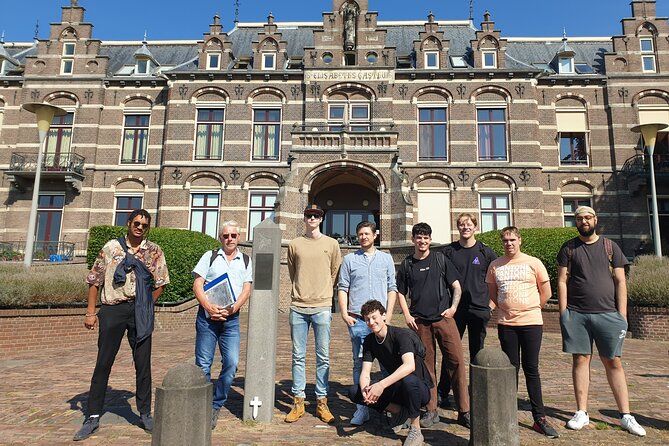
In Arnhem, the guide makes stops at the Zwarteweg, associated with the Urquhart hideout, and St. Elisabeths Hospital, which served as a medical facility during the battle. You then continue to the John Frost Bridge.
The allotted time for this part is about 30 minutes. Since it includes more than one location and the transfer onward, expect short visits rather than a long stay at each site. The benefit is breadth. You see both a command-related location and a medical site, giving you two different views of the battle.
The Zwarteweg stop helps broaden the story beyond the bridge itself. The mention of Urquhart’s hideout points to the command and communication problems that shaped the battle, while St. Elisabeths Hospital brings attention to medical care under wartime conditions. These details keep the day from becoming a single-location bridge tour.
I would pay close attention during the drive between stops. The tour includes other locations that the guide points out along the route, and these passing sites may help fill in the gaps between the scheduled visits. Because the itinerary is compact, the guide’s spoken explanation is part of what you are paying for.
John Frost Bridge: the tour’s best-known location
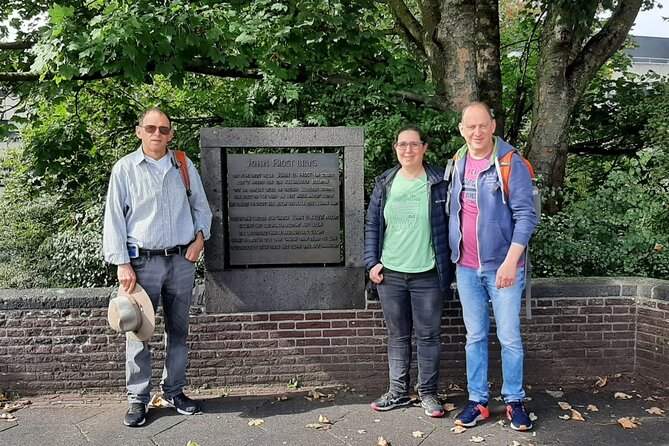
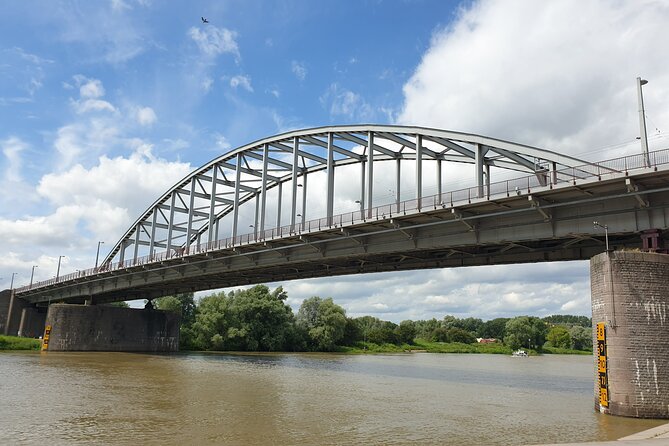
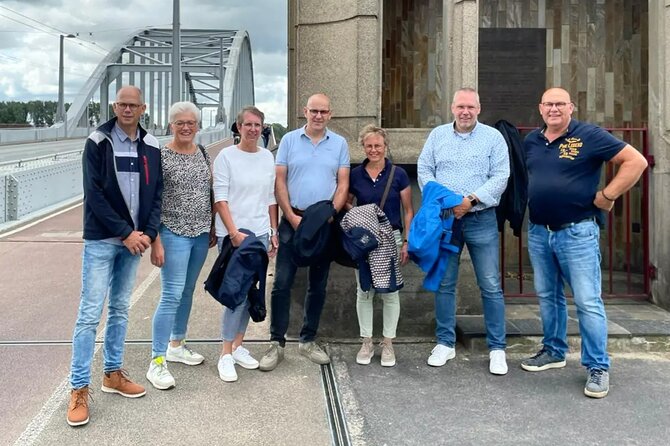
The final major stop is the John Frost Bridge, also known as John Frostbrug. You have about 40 minutes here while the guide explains the fighting at the bridge often described as a bridge too far.
This is the natural climax of the route. By the time you arrive, you have seen where the operation began, visited the cemetery, examined battle damage at the Oude Kerk, and considered command and medical locations in Arnhem. The bridge then becomes the point where those earlier parts come together.
Forty minutes is the longest scheduled sightseeing stop, which makes sense. The bridge is the most recognizable location, but its importance is easier to understand after the earlier stops. Arriving here first could reduce the battle to a famous photograph. Reaching it at the end gives the guide a chance to explain the broader sequence.
The bridge is also a practical reminder that this is an active urban setting, not an isolated battlefield preserved exactly as it was. The tour focuses on the story connected with the location. You should not expect a large visitor center or a long indoor program based on the information available.
Lunch in Oosterbeek: a useful pause at your cost
The tour includes a 30-minute lunch stop in Oosterbeek. Lunch is not included in the price, so you should budget separately for your meal.
A short break is welcome after several serious stops and a good chance to ask the guide follow-up questions. It also keeps the six-hour route from feeling like one long block of commentary. On the other hand, half an hour is a quick lunch window, so this is better suited to a simple meal than a leisurely restaurant experience.
Since the exact restaurant is not specified, ask about the lunch plan when you confirm the pickup details. You will want to know where the stop is and how much time you have before the route continues. The important point is that the meal is part of the schedule, but not part of the $971 cost.
Original maps and firsthand accounts make the difference
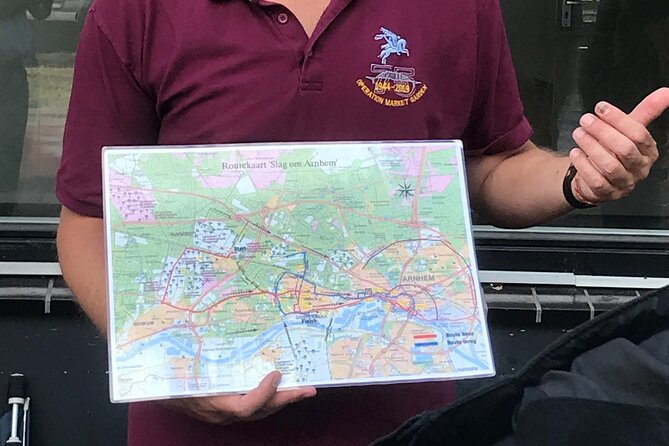
The strongest praise for this experience centers on David’s guiding. He uses original maps showing how the battle progressed and adds firsthand information from British army survivors. That combination is more useful than a stream of dates and names.
Maps help you follow movement across a wide area. At Wolfheze, they can set up the opening of the operation. At Oosterbeek, they can clarify how the cemetery and Oude Kerk relate to the fighting. In Arnhem, they can connect the Zwarteweg, St. Elisabeths Hospital, and John Frost Bridge.
Firsthand accounts add a human voice. They can show what the battle meant to the people involved, not only where units moved. The available feedback gives David specific credit for reconstructing the battle in this way, and that is an important reason to consider this tour over a basic sightseeing drive.
The experience will suit you best if you enjoy asking questions. A private format gives you the chance to stop and clarify terms, timelines, or locations. If you prefer to explore silently or spend most of your time taking photographs, you may not get the full value from a guide-led history tour.
The $971 price: fair for three, harder to justify alone
At $971 per group of up to three, the cost works out to about $324 per person for three people. For two people, it is about $486 per person, and for a solo booking the full group price applies.
That is a substantial sum, but the comparison should be with a private six-hour vehicle and guide, not with a public monument visit. The price includes private transportation and a dedicated guide across several towns. It also includes the interpretation that links the sites, original maps, and firsthand accounts.
The value is strongest when three people share the booking. A family, a small group of friends, or a pair of serious battlefield students may find the convenience worthwhile. For one person, the price is much harder to defend unless a private format is especially important.
There are no admission charges at the listed stops, so the price is mainly paying for transport, time, and guiding. Lunch is extra. You should also remember that travel time is included in the six hours, which makes the broad route possible but means the tour is not six hours of stationary sightseeing.
Who should book this Battle of Arnhem experience
I would recommend this tour to you if you want the battle explained as one connected story. It is especially suitable for:
- Small groups of up to three who value privacy
- People with a strong interest in military history
- Visitors staying in Arnhem or Oosterbeek who want pickup options
- Anyone who prefers a guide with maps and personal accounts
- Those who want to see several battlefield locations in one day
It may be less suitable if you want a cheap introduction, a museum-heavy program, or long free time at every stop. The schedule moves steadily, and some locations receive only 20 or 30 minutes.
Wear practical shoes and be ready to move between outdoor sites. The information provided does not specify a special walking requirement, and most people can participate, but the day involves getting in and out of a car and walking around cemeteries, streets, church grounds, and the bridge area.
The tour is offered in English. Service animals are allowed, and the route is near public transportation, although private pickup remains the main convenience.
Booking details that matter
Your starting point can be Arnhem Central Station, at Stationsplein 166, 6811 KL Arnhem, or another agreed location. Pickup may be arranged from a hotel near Arnhem or Oosterbeek, Oosterbeek railway station, or Ede railway station.
Confirmation is sent within 48 hours of booking, subject to availability. Since pickup details are discussed before the booking is final, use that conversation to confirm the exact meeting point and lunch arrangements.
The activity ends back at the meeting point. Free cancellation is available if you cancel at least 24 hours before the local start time. Changes or cancellations made inside that 24-hour window are not accepted for a refund.
Should you book the six-hour Arnhem tour?
Book it if you want a private, guided reconstruction of the Battle of Arnhem and can share the cost with two other people. David’s use of original maps and British army survivor accounts is the feature I would value most, because it turns a string of locations into a clear sequence.
Think twice if you are alone, watching your budget, or mainly interested in seeing the John Frost Bridge. You can expect a serious, efficiently paced battlefield day with free-admission sites, private transport, and a guide who supplies the connections. For a small group that wants context instead of a quick drive-by, the price can make sense.
FAQ
How long does the Battle of Arnhem tour last?
The tour lasts approximately six hours, including travel time between locations.
How many people can join the private tour?
The private tour is for a group of up to three people.
What time does the tour start?
The scheduled start time is 10:00 a.m.
Where can the tour begin?
The standard meeting point is Arnhem Central Station, Stationsplein 166, 6811 KL Arnhem. Pickup may also be arranged from a hotel near Arnhem or Oosterbeek, Arnhem railway station, Oosterbeek railway station, or Ede railway station.
Is lunch included in the price?
No. The tour includes a 30-minute lunch stop in Oosterbeek, but you pay for lunch separately.
Is transportation included?
Yes. Private transportation is included, and the activity ends back at the meeting point.
Can I cancel for a full refund?
Yes, if you cancel at least 24 hours before the experience start time. Cancellations or changes made less than 24 hours before the start are not refunded or accepted.
Just added around Arnhem
- Exciting Murder Mystery – Interactive city walk in Arnhem★ 4.5 · 3 reviews
- Otterlo: De Hoge Veluwe National Park Entry & E-bike★ 4.5 · 4 reviews
- Otterlo: E-chopper rental★ 4.5 · 4 reviews
- Arnhem Self Guided Sherlock Holmes Murder Mystery Game★ 4.5 · 5 reviews
- 1,5 hour private guided Mural Street Art tour in Arnhem★ 5.0 · 5 reviews
- Arnhem: Dutch Open Air Museum Entry Ticket★ 4.7 · 6 reviews
- Amsterdam: Private tour to Kröller-Müller Museum★ 4.8 · 7 reviews
- Discover Arnhem with a self-guided Outside Escape city game tour!★ 5.0 · 8 reviews
Arnhem Tours, compared.

Otterlo: De Hoge Veluwe National Park Entry Ticket
Read our review →
Oosterbeek: Airborne Museum Hartenstein Entry Ticket
Read our review →
Small Group Tour to NP Hoge Veluwe (van Gogh) from Amsterdam
Read our review →
e-Scavenger hunt Arnhem: Explore the city at your own pace
Read our review →
Kröller Müller Museum and Hoge Veluwe NP Private Tour
Read our review →
2,5 hour Battle of Arnhem Tour with Private Guide
Read our review →Browse the lists this tour appears in